Model FSSK
building the worlds best keyboard.
Hello everyone it’s been quite a while! Alas I have finally returned to share with you a project that took me almost 5 years of procrastination to finally put together. This is my IBM FSSK! One of very few fully assembled Model F/SSK hybrids, as originally designed by i$. I type this post on my FSSK and it is without a doubt a perfect keyboard. I am still a little in shock. Click the spoiler for way too many photos of the build process.
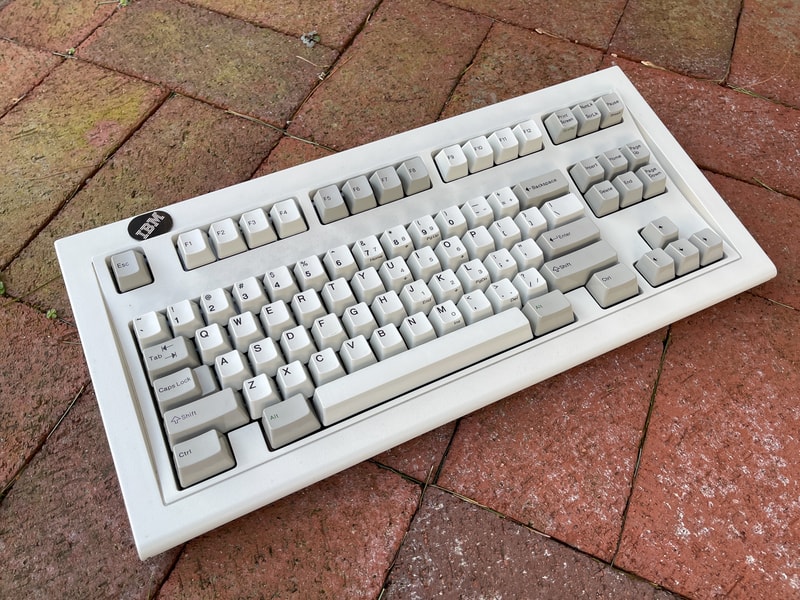
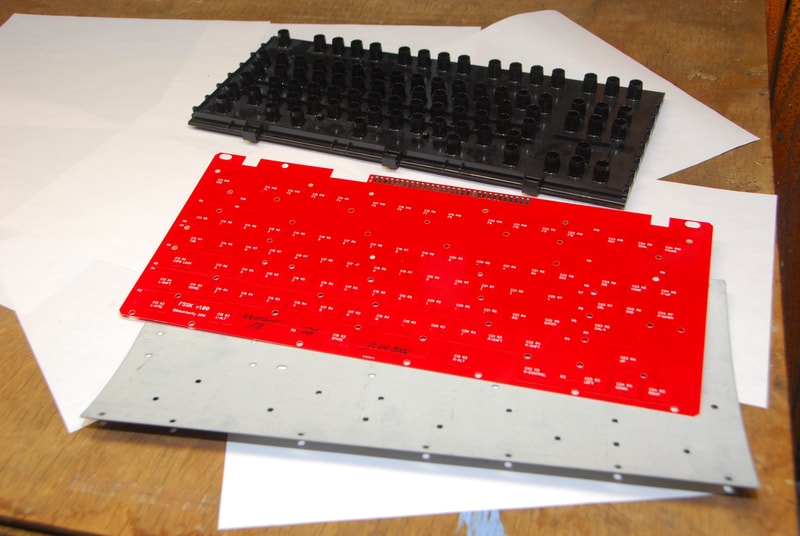
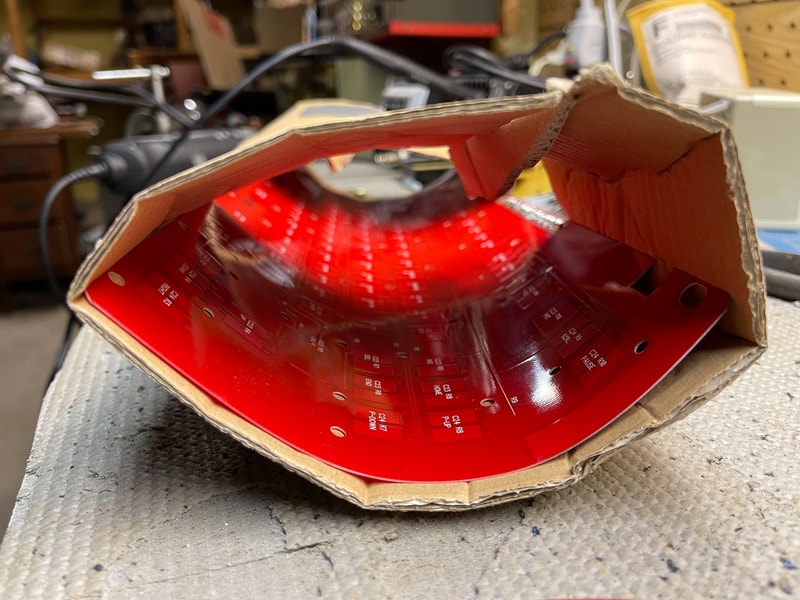
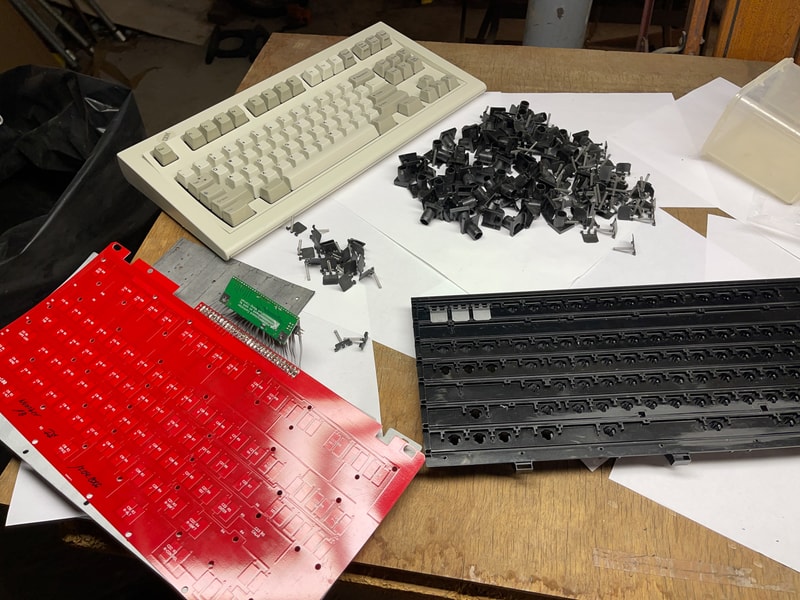
I got in on i$ original group buy for round 1 of the FSSK PCBs back in 2016 and wound up with PCB #18. The SSK that I am converting, was a 1391472 with a birthday of November 25th 1987. The original barrel plate was one of the white ones and pretty badly cracked, so I wound up scrapping it and ordering a new one from Unicomp.

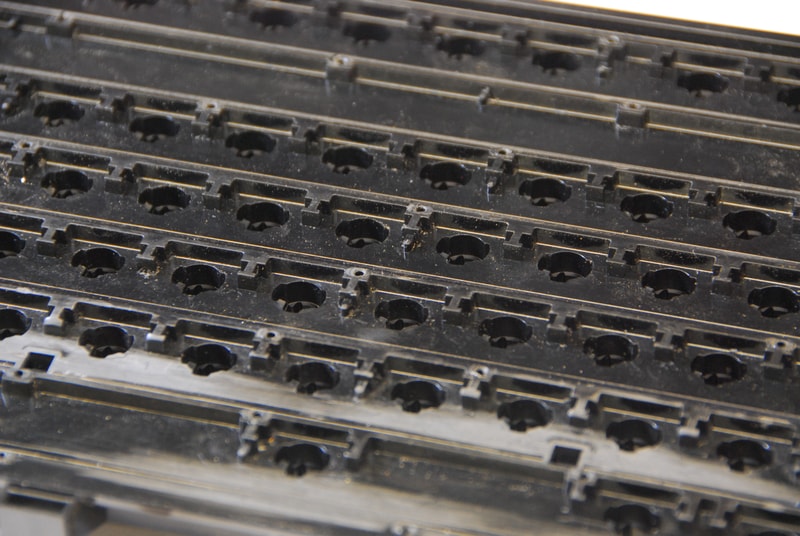
The first step is prepping your barrel plate for a screw or bolt mod. On a stock Model M the barrel plate has a bunch of these plastic rivets that go through the metal backing plate and get melted down to hold everything together. We will be using the same points to hold everything together with screws, so I used a razor blade to chop the rivets off. Your goal is to get everything flush.
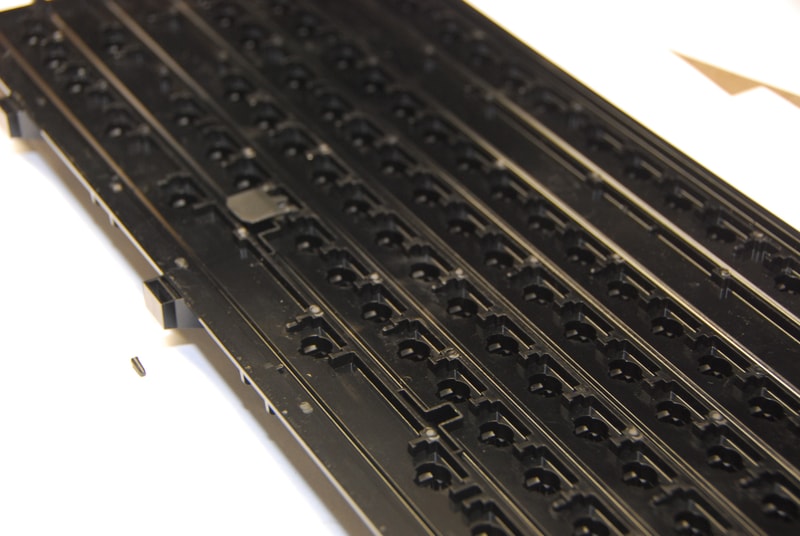
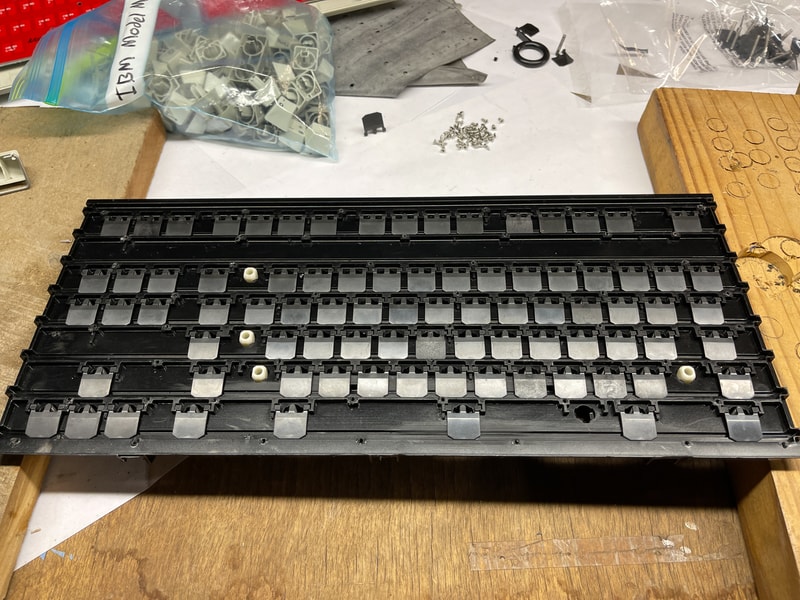
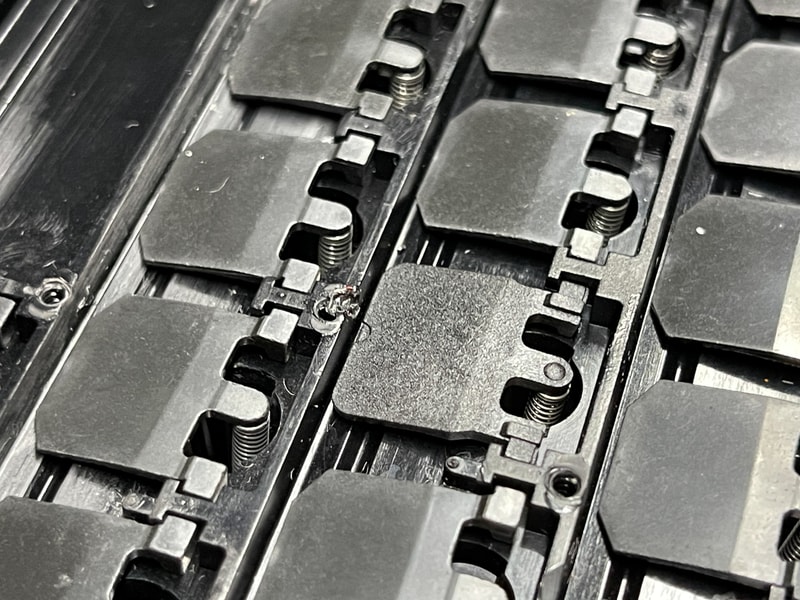
With all the rivets cut off, the next thing to look for is on the bottom row above the spacebar are two raised plastic sections in the channel. These plastic pieces would not normally block the smaller Model M flipper from flipping, but as you can see, it doesn’t allow the Model F flipper to lay flush.
This is was pretty easily accomplished with a combination of razor blade, clippers, and wet sanding. There might have been a Dremel involved at some point but however you accomplish it, make sure its nice and smooth and the flipper can sit flush in the barrel plate.
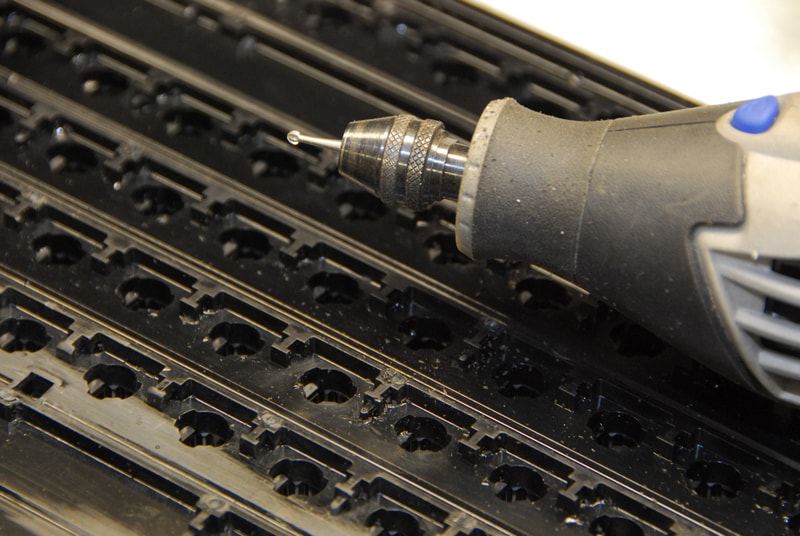
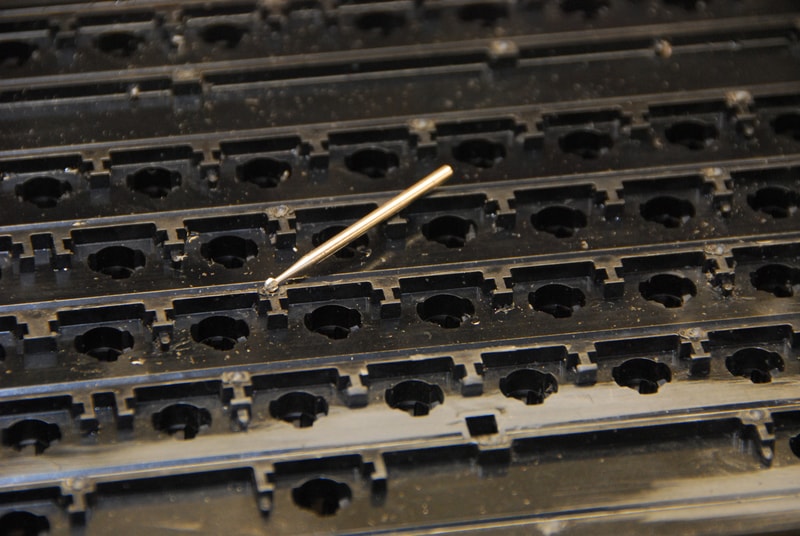
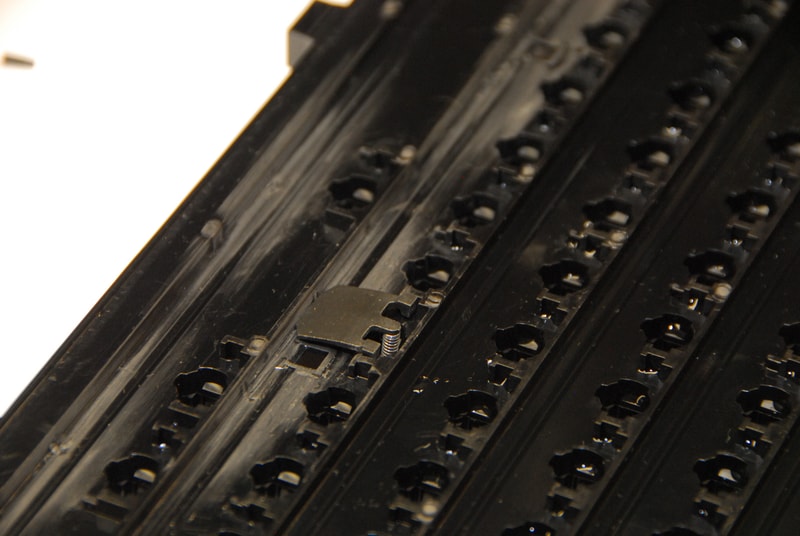
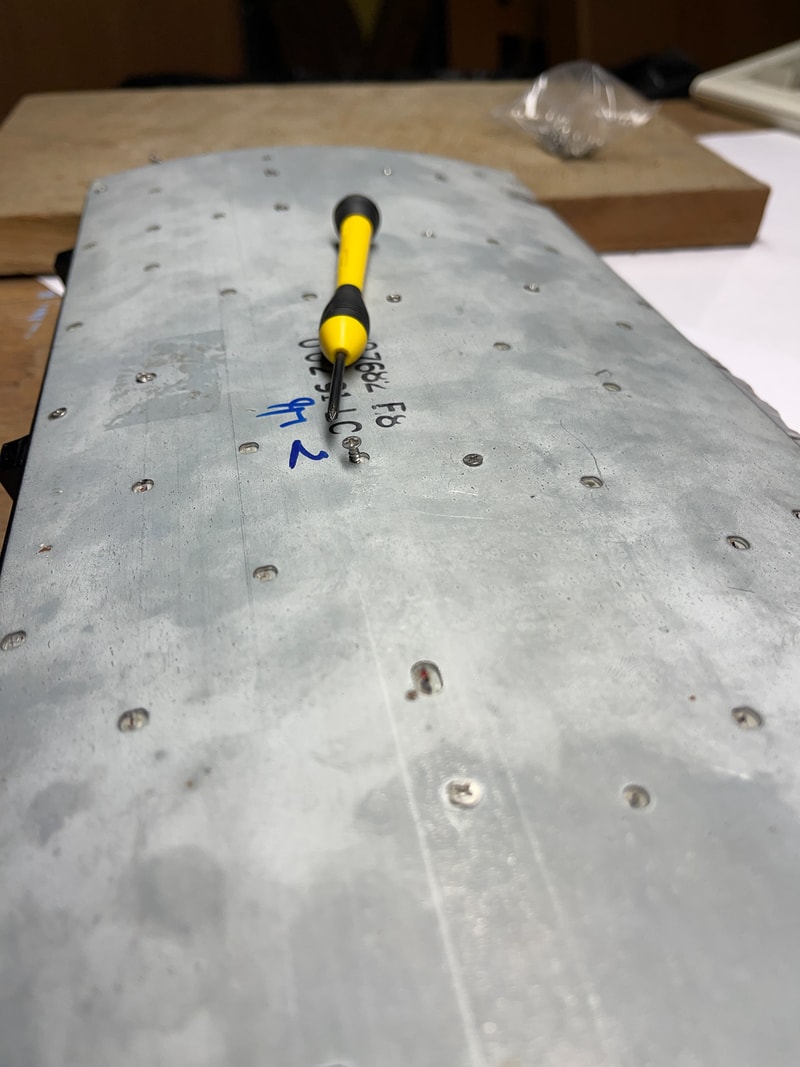
Speaking of the Dremel, its time to break out the small carving bit. Before we drill the holes in the barrel plate, I went through all of the cut rivets and made a small starter hole. After wards I went back over with the razor blade and cleaned up the plastic to ensure it was once again flush. This step just made drilling holes easier.
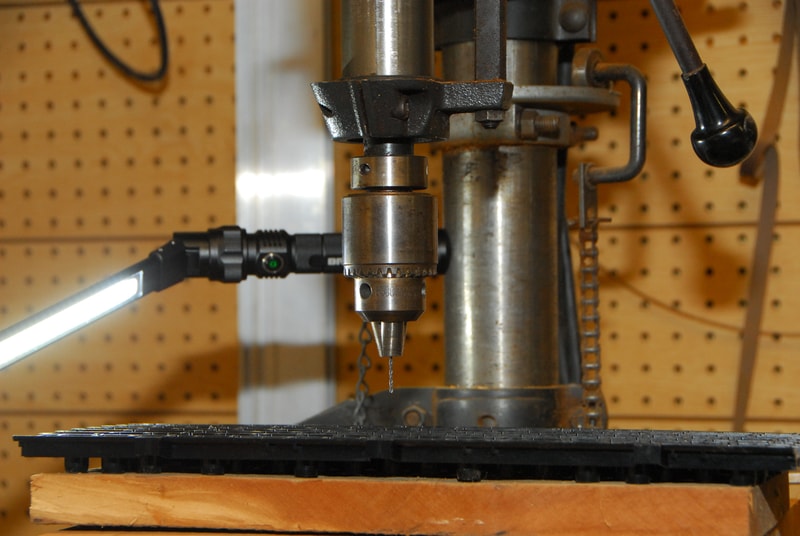
Having a drill press for this step was immensely helpful. For reference sake I am using M2 1/4” Flat Head Screws Part Number 90065A077 from McMaster-Carr and I used a 1.7mm drill bit Part Number 2958A41 from McMaster-Carr. I read some conflicting reports on whether or not a 1.5mm hole or a 1.7mm hole worked better for these screws so I bought both bits just in case. I did some testing with both bits and the 1.7mm felt like the right choice. After putting this board back together and taking it apart 4+ times I would say that is still the right choice.
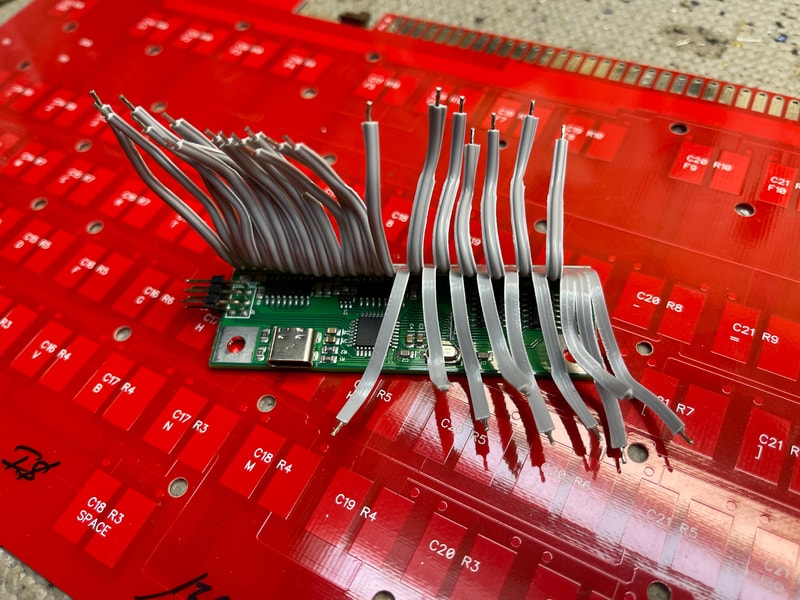
Believe it or not the gap from drilling the barrel plate to this picture was almost 2 years! The rest of this build process was completed in the last few days, and all the pictures were shot on my iPhone. I bought this WCass Xwhatsit converter from Ellipse, along with some extra flippers and a USB-C cable. Props to him for the fast shipping, it was the off chance of seeing that he had converters in stock that made me take the leap to get back and finish this damn project. First thing first, I split and separated all of the wires in the cable. Used a razor to start the cut and then just pulled the wires apart.
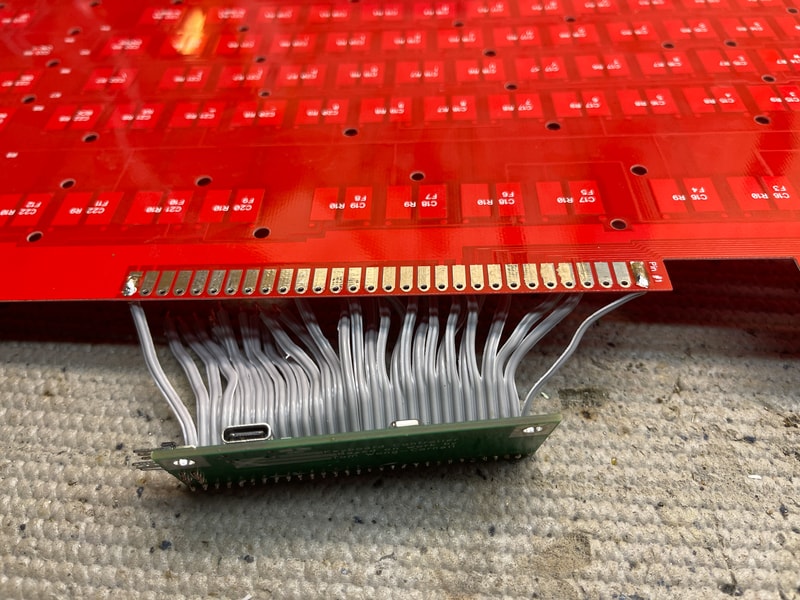
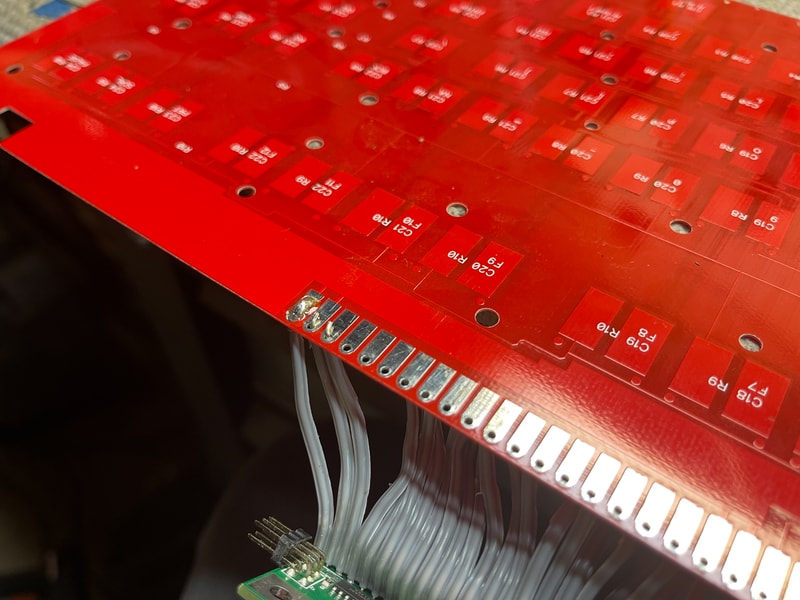
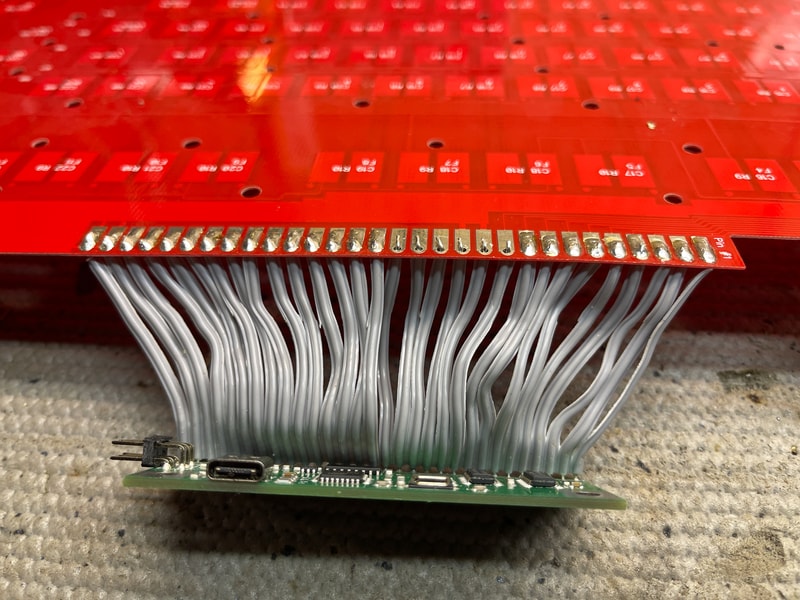
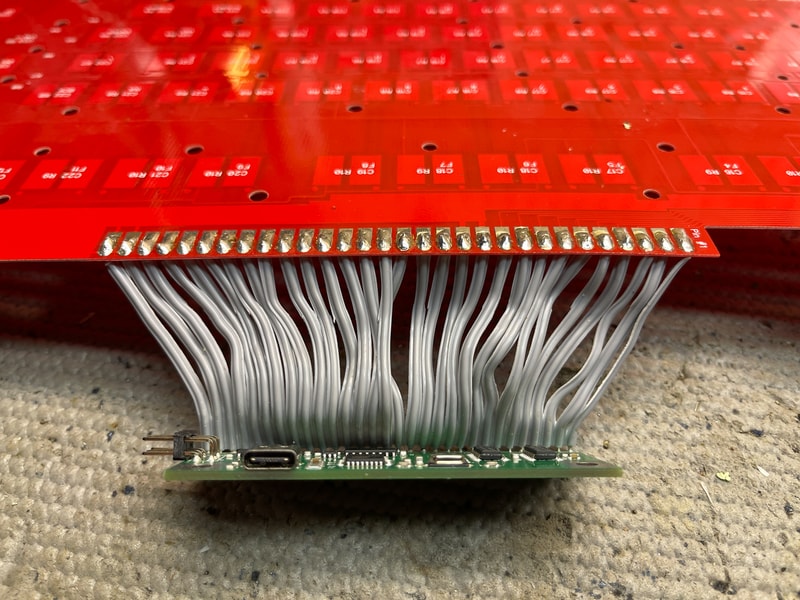
Soldering the controller was surprisingly easy. I started with the two extremes and worked my way towards the middle. As with soldering most thru-hole components I found it was easiest to insert the wire and then bend it forward towards the pad to hold it in place before applying solder.
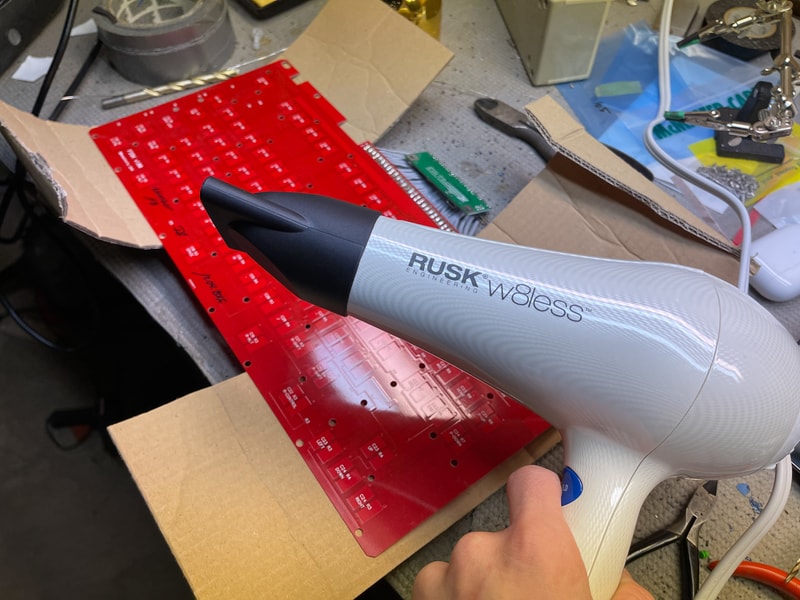
If I wasn’t clear before, I have been following along with the official i$ FSSK Installation Guide. I am not exactly sure how necessary this next step was but it was in the guide, and no matter how nerve wracking it was to bend the PCB, it didn’t seem to hurt anything, so I say go for it!
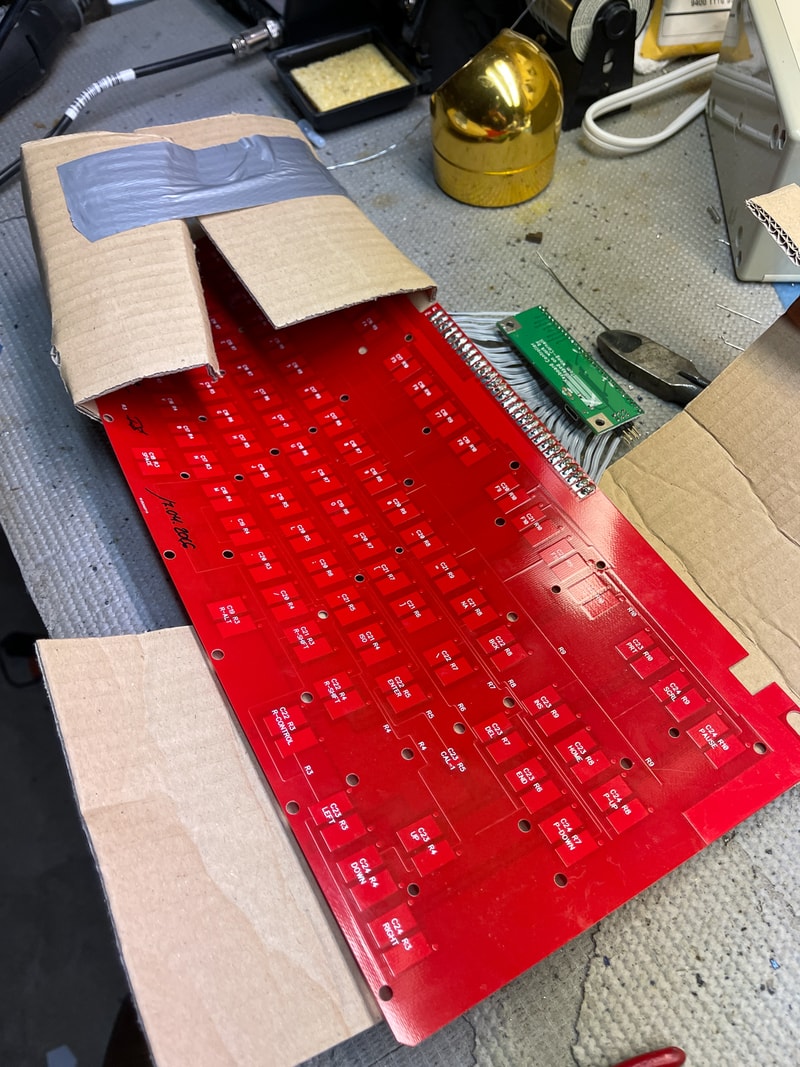
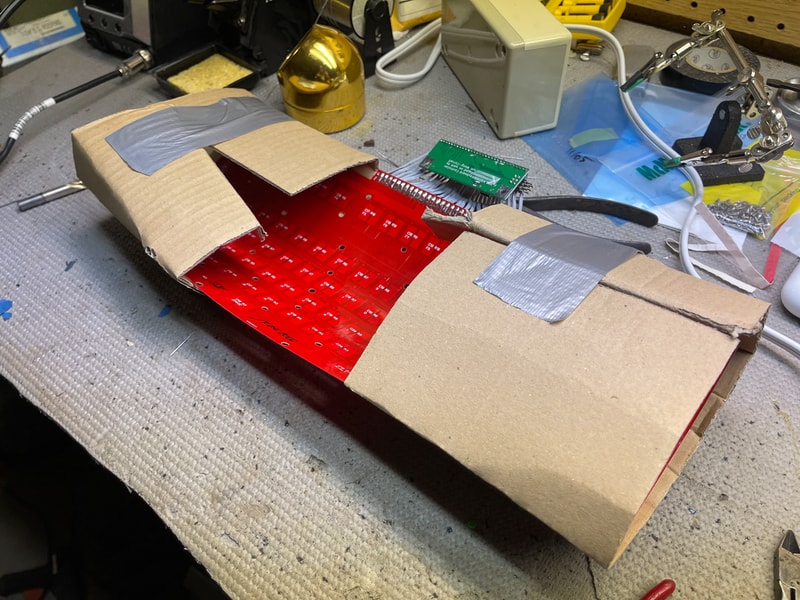
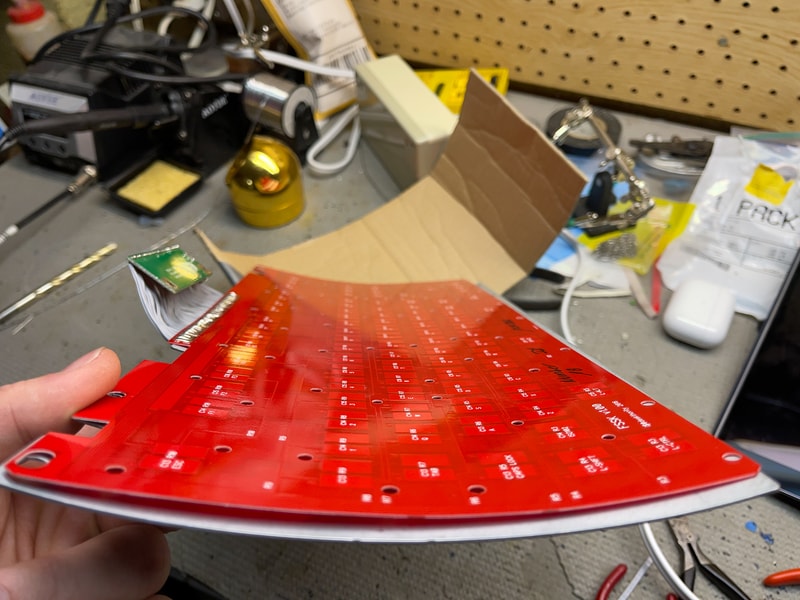
The process was pretty self explanatory. Just like i$ I used two strips of cardboard on either side of the PCB. I spent a while (~10 minutes) heating up the whole PCB which just wasn’t really working. So I focused on one side at a time getting it hot to the touch, and tried to bend it as much as I could without pushing it too hard, and taping it. I repeated the same for the other side, and once both sides were taped up, I heated the center and sides of the PCB more and increased the amount of pressure on each side. I let this cool for a good 20 minutes and I was left with a slightly bent PCB
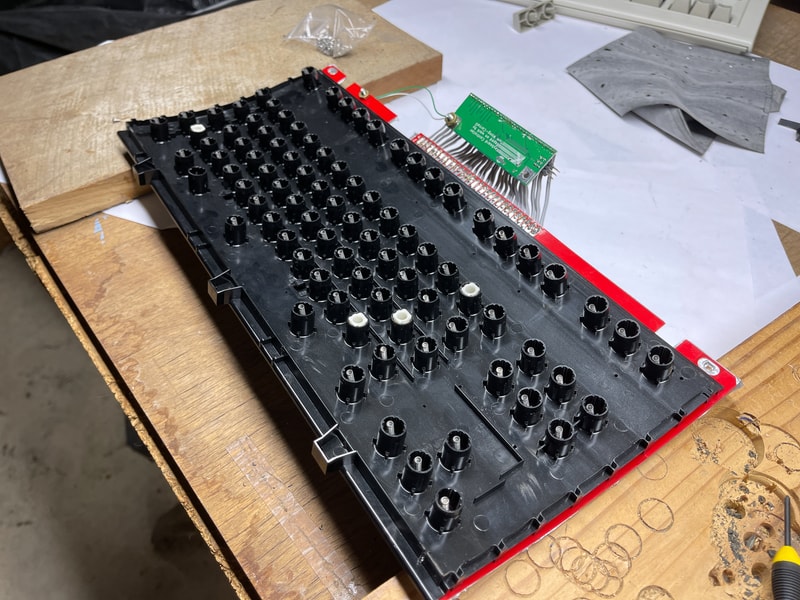
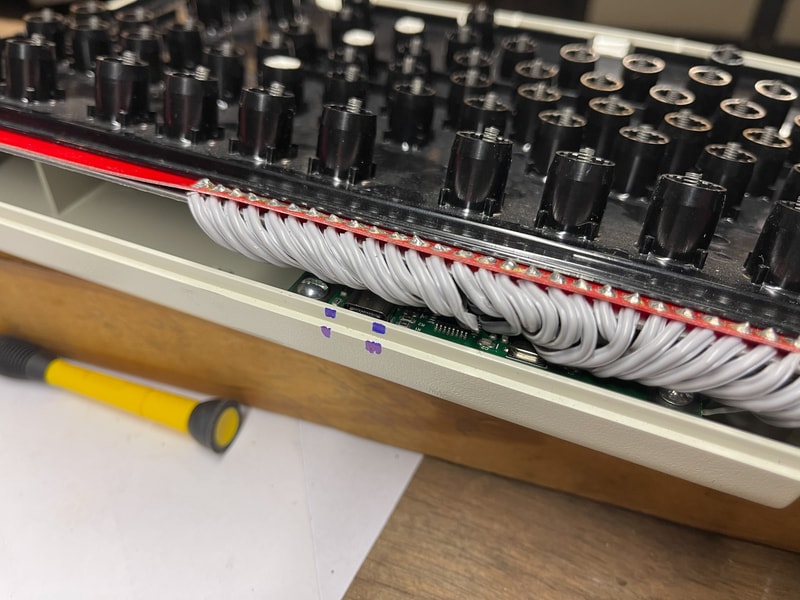
One of the more annoying parts of dealing with these Model F keyboards and controllers is getting the controller properly grounded.

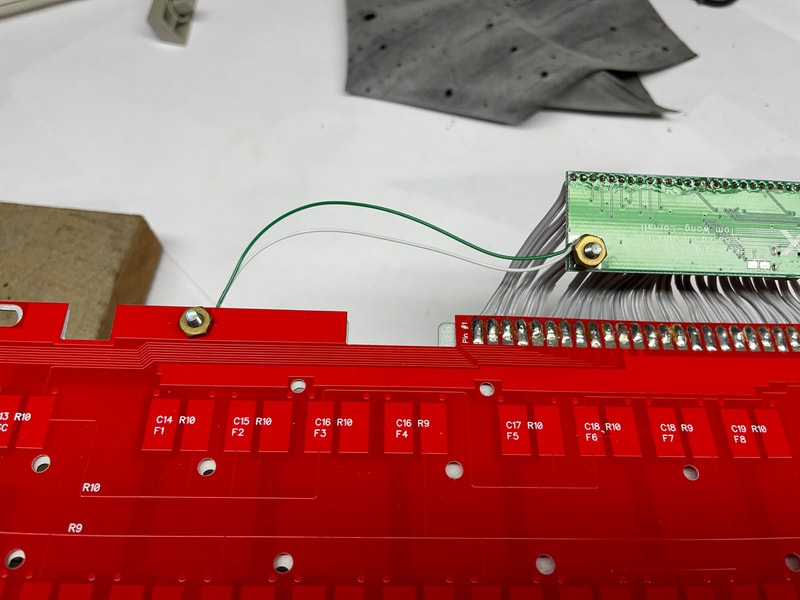
I took another page out of the i$ playbook and made myself a grounding wire with some spare screws and nuts, and I think wire from a cut up USB cable. Later on I made a second grounding wire for the other ground spot on the controller, but I don’t think I took a clear photo of that. Same process, and bolted to the same spot on the metal backing plate.
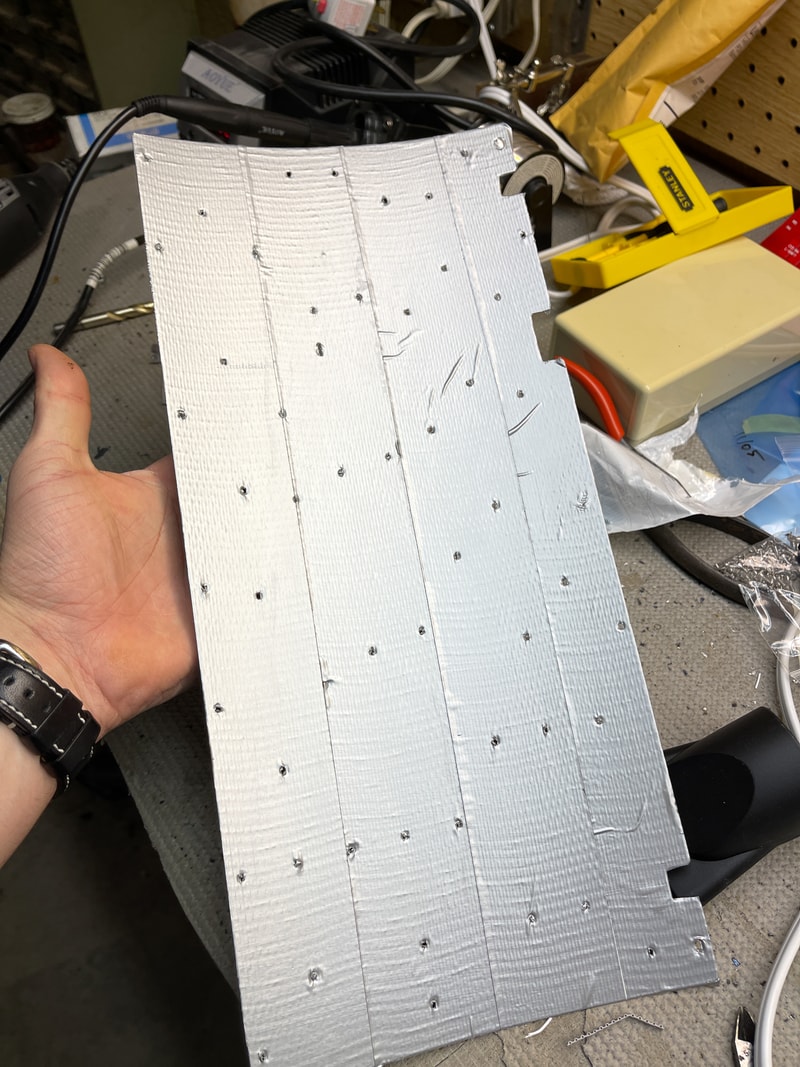
Next up is insulating the metal backing plate. For this I used regular old duct tape and took a screw driver to poke holes through the tape.
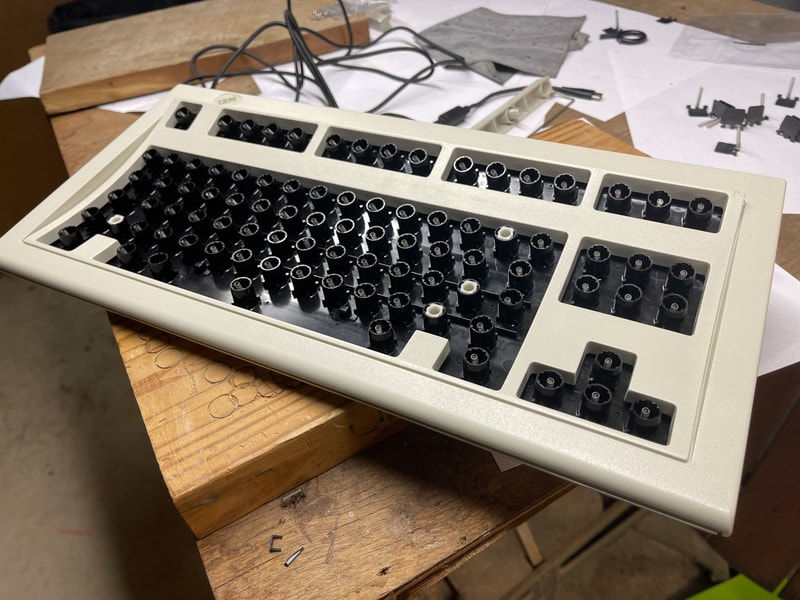
Now we finally get to the ultimate in tedium - the final-ish assembly. Before proceeding please note that getting an FSSK (or any Model F completely dialed in - is quite the effort of trial and error. You almost certainly will have to take this apart again after your initial assembly, its just the way of the Model F. To mitigate some of the error you can do some testing now and save yourself some headaches. If you plug the board in to the computer now you can use a single flipper and test all of the pads on the PCB to make sure that every key does in-fact register with the controller. Hopefully of course all the keys will register, but if not - at least you found out before you put it all together right??
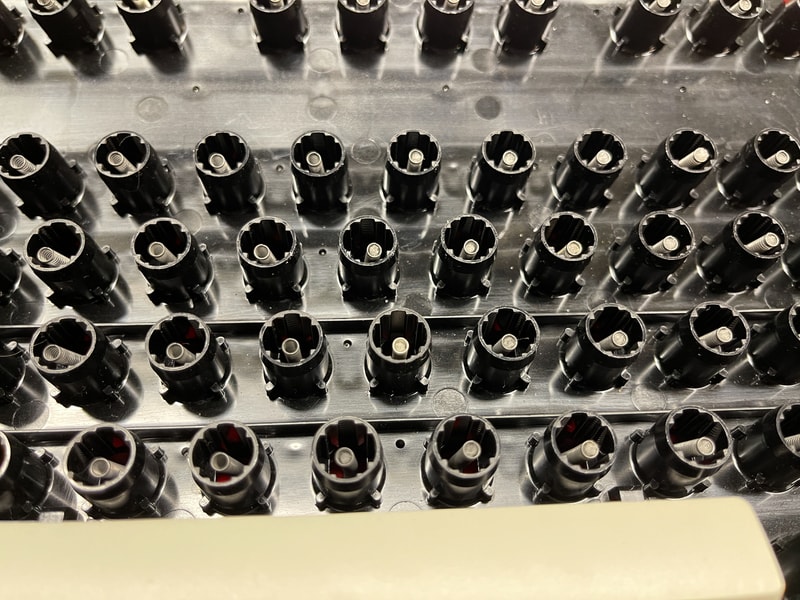
Populating the barrel frame with springs and flippers can be a pain in the ass. Especially if you have to do it multiple times. I would highly recommend propping up the two ends of the barrel frame with some wood or a couple books or something so that the flippers can be completely suspended in the frame when you attempt to assemble everything.
Obviously the next step is lining up the metal backing plate and PCB onto the barrel frame and screwing everything together. This is where the tedium comes in. All I can say is that I think I got incredibly lucky that it only took a trial and error process of 4 assemblies/dis-assemblies to get everything dialed in. I tended to start in the 4 corners of the keyboard and worked my way into the center row when screwing everything together. Trying not to put too much screw pressure in one area of the board over another.
Technically you do not need ALL of the screws in place to test the keyboard, but I found that the capacitance and the xwhatsit software was very sensitive to how much pressure was holding everything together, and whether all the keycaps were on. So for each of my tests I wound up putting every screw in.
I will spare you the minutia of all the annoying issues I ran into but it basically amounted to being very delicate with the barrel plate and backing plate as you were starting to screw everything together. On my first attempt I believe I jostled the table and that knocked loose some of the flippers, and resulted in a handful of keys not working and even 2 flippers with broken feet!
In this photo you can see two interesting things. One is the difference between the OG Model F flippers and Ellipses reproduction flippers, but more importantly you can see that the screw right below the Ellipse flipper made its own path into the barrel plate! On multiple attempts of assembly the ‘J’ key was consistently not only not registering, but also not sounding right either. Having ensured that the pad on the PCB was properly functioning, I realized that when the screw dug through the barrel plate it was blocking the flipper from hitting the PCB. I wasn’t really able to repair this, but luckily this was the only spot where I ran into the issue so I simply left that screw out of the final assembly.
We are at the home stretch now. Assuming you have everything functioning properly with the software, and all the keys click as they should, its time to fit everything back into the case.
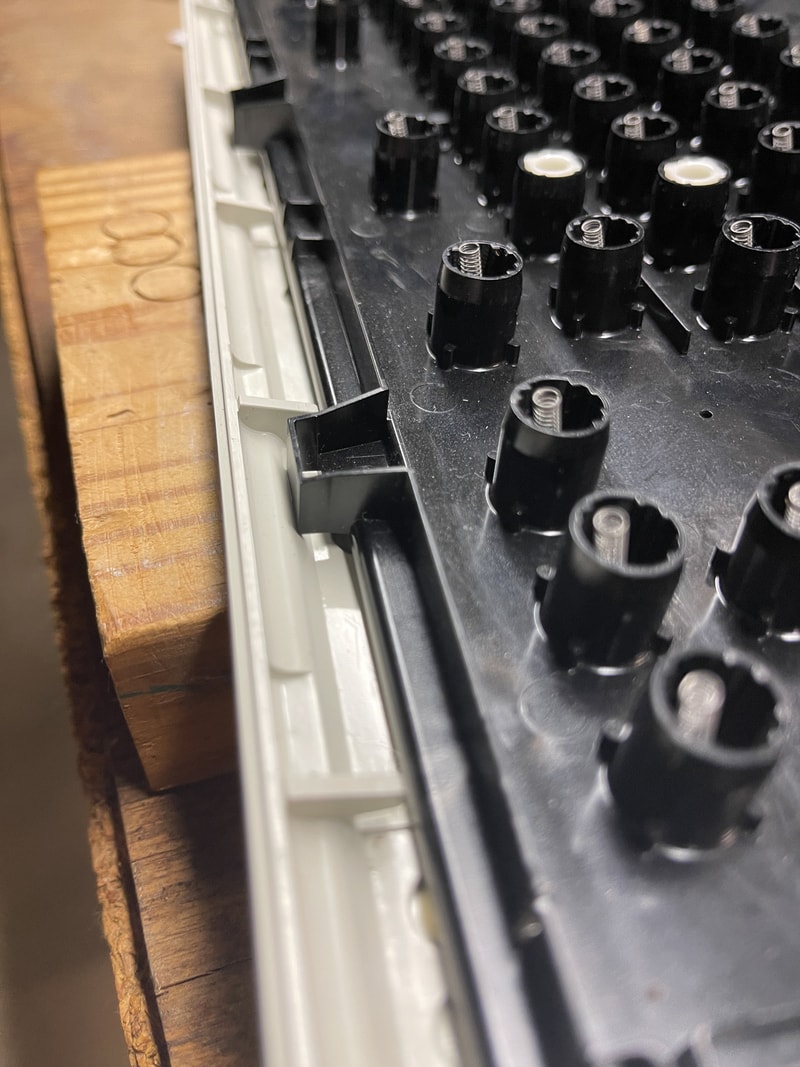
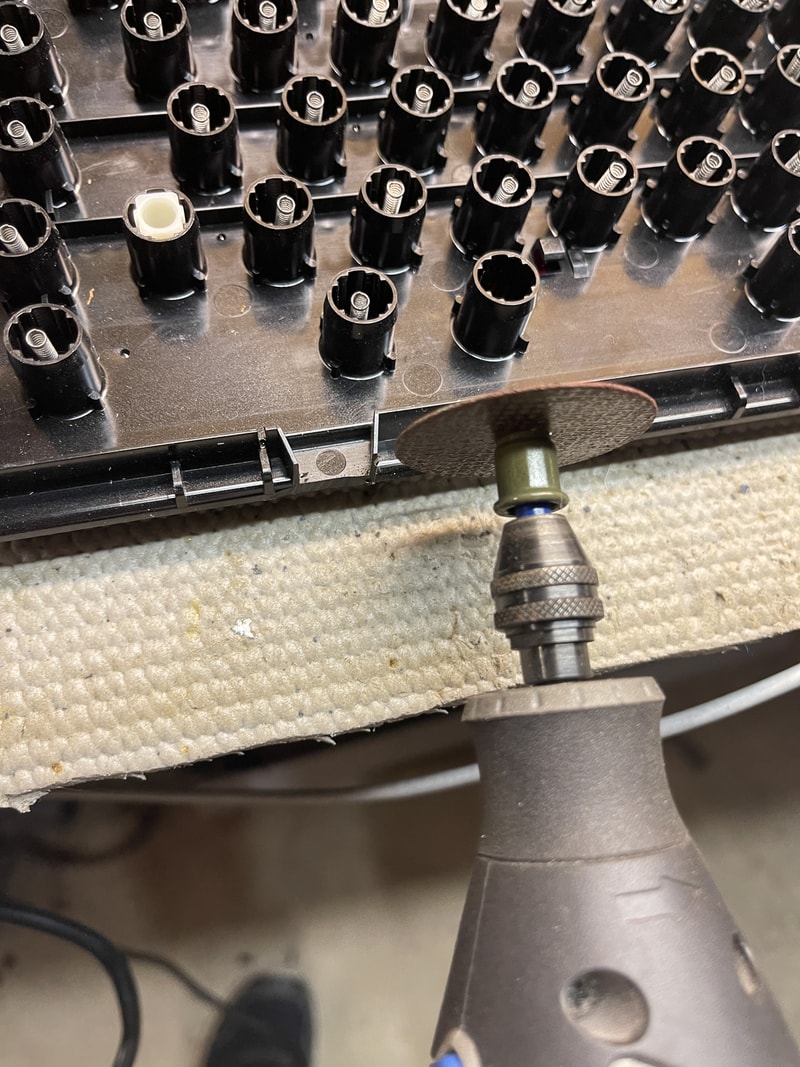
Since I purchased this OEM barrel plate from Unicomp it had some extra plastic bits at the bottom of the barrel plate that did not fit into my 1987 case. A couple quick cuts with the Dremel fixed that right up.
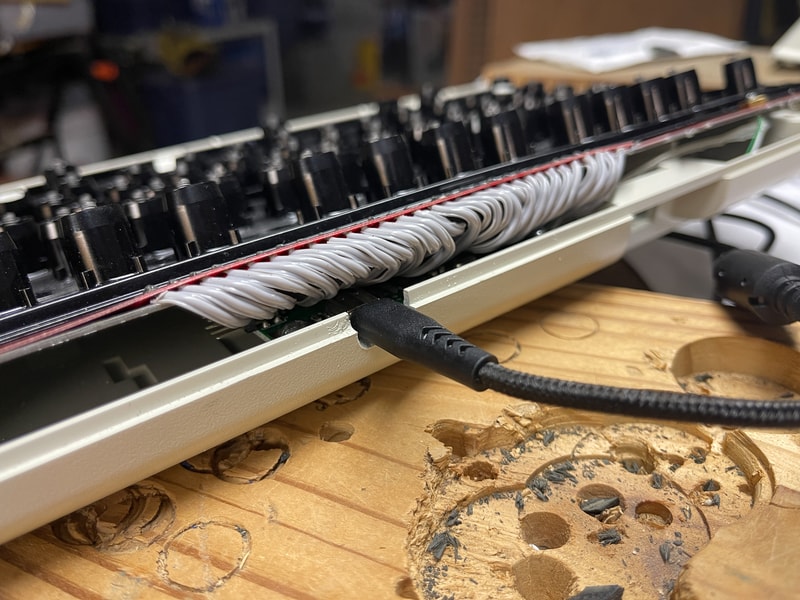
The next issue was the location of the integrated USB-C connector on the Wcass controller. Unlike on the original Model F Xwhatsit converter with a side mounted connector, this one was directly lined up with the back of the case… Seeing no real good option for routing the cable through the existing port hole in the case, I decided to Dremel it out. I really didn’t want an integrated cable on this keyboard anyway - its harder to store and its unruly - so this was the best case scenario.
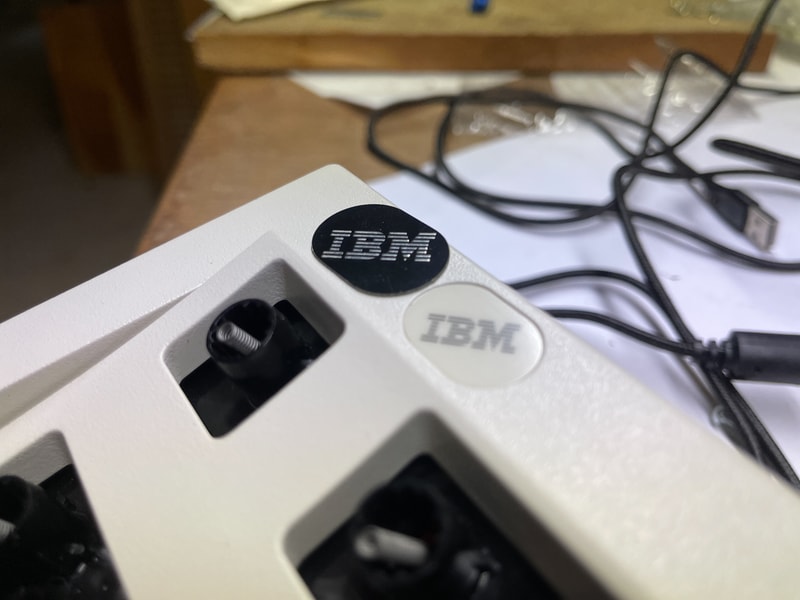
I joined a group buy hosted by Seebart (I believe?) for these awesome black and silver IBM logos (cut out of PCB). I put some double sided Gorilla Tape on the back and stuck it on.
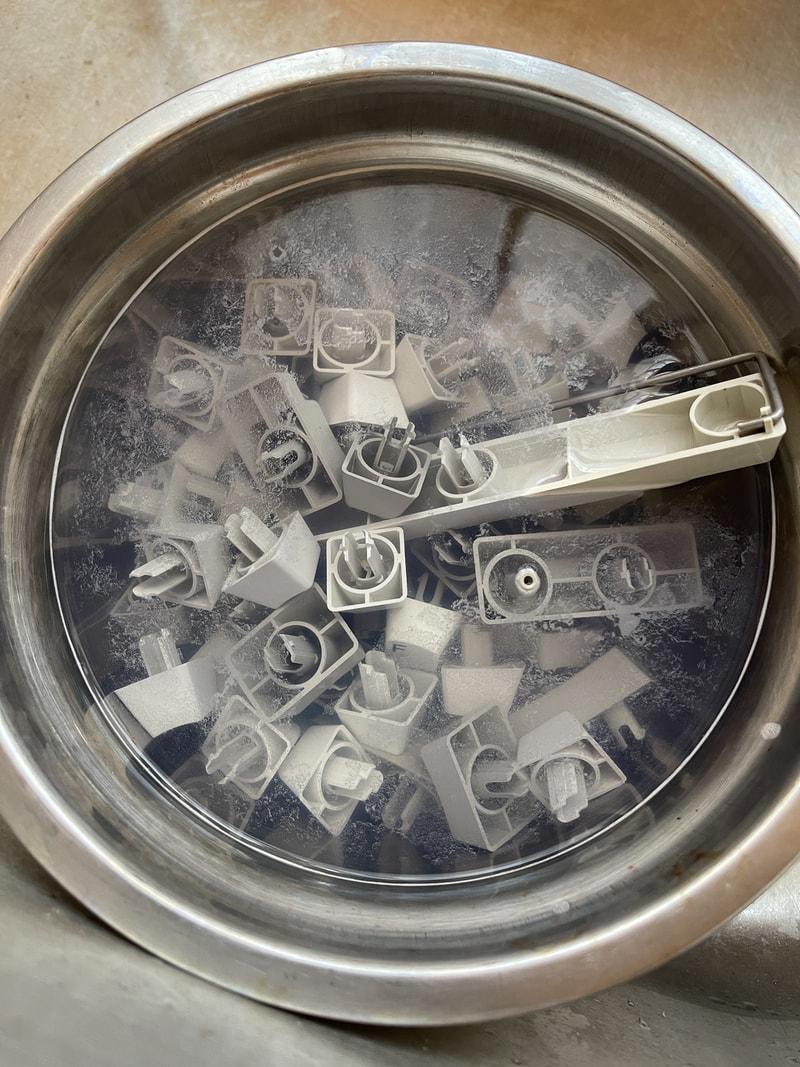
I gave my OG one piece keycaps a nice bath in detergent.
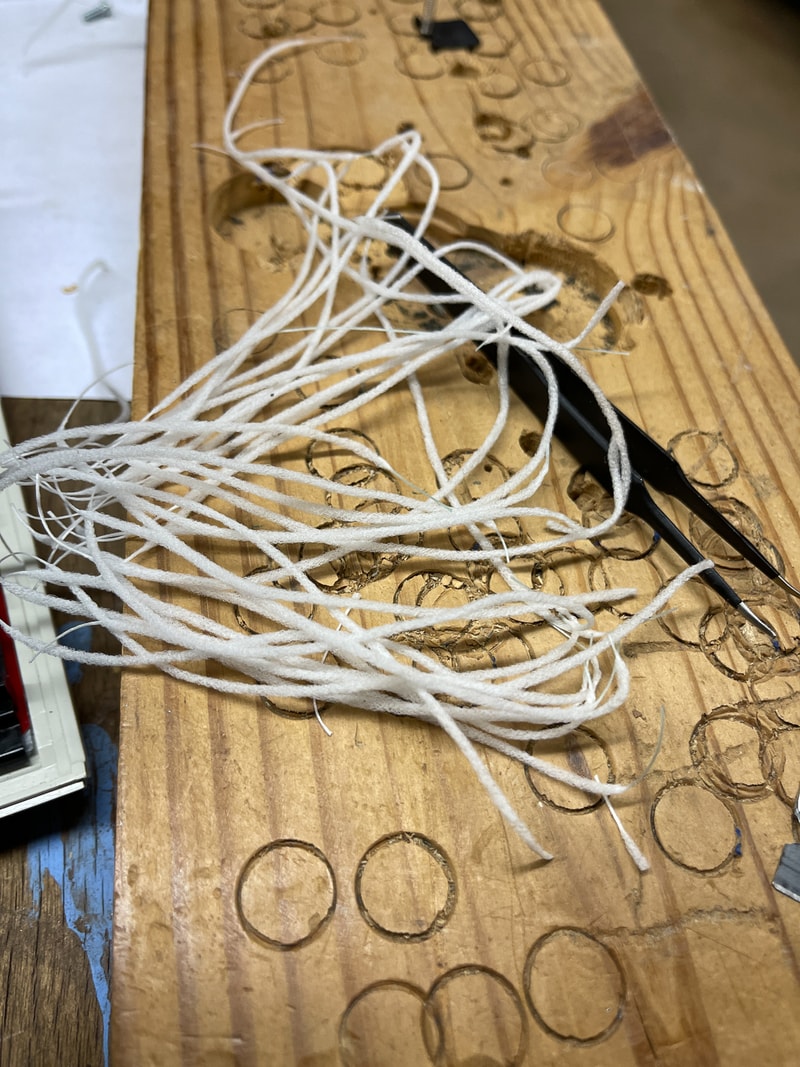
Finally I did a floss mod. This keyboard was very pingy without the floss, and with the floss it sounds absolutely perfect. I also added some Krytox 204 on the spacebar stabilizers.